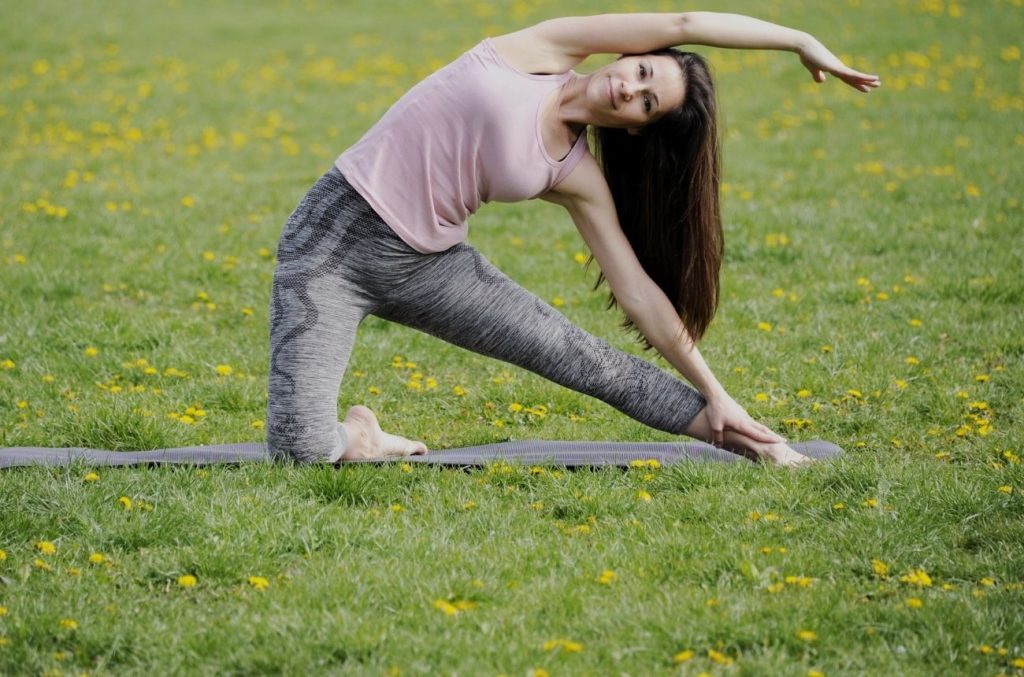
Parighasana – Gate Pose

Parighasana or the Gate Pose is one of the asanas focussing on the stretch of the side body. It is a kneeling pose suitable for students of all levels. Gate Pose is considered a base pose as gate pose variations can be derived from this pose.Â
Parighasana is great for the preparation for poses such as Utthita Trikonasana and Utthita Parsvakonasana, Parivrtta Janu Sirsasana and Visvamitrasana. It stretches the side of the torso from the hips to the armpits along with the intercostal muscles.
Parighasana is also extremely beneficial if practised during pregnancy. It lengthens the sides of the belly, making more space for the internal organs as well as the baby.
Parighasana can be done as part of a warmup, cool down or stretching routine
Regular practice of the Gate Pose improves posture, grace, and adds a range of motion in everyday life. It also helps in deeper side stretches and better breathing habits.
Gate Pose helps boost energy in the body and hence can be included in flow yoga sequences.
Benefits
- Flexibility: Increases the flexibility of the spine, shoulders, hamstrings and sides of the torso. The Gate Pose also loosens up the muscles of the back making it more flexible.
- Breath and Respiration: Stretches the intercostal muscles and helps with respiratory problems related to asthma, allergies, and flu. Improves breathing capacity and increases oxygen in the parts that usually don’t receive a high amount of it.
- Strength and Balance: The Gate Pose builds core strength and improves balance.
- Digestion and Circulation: Aids digestion and stimulates abdominal organs and lungs, also stimulates circulation
- Preparatory pose: The Gate Pose, is a great preparatory pose for standing, side-stretching poses, and poses such as Utthita Trikonasana and Utthita Parsvakonasana, Parivrtta Janu Sirsasana and Visvamitrasana.
- Pregnancy: The Gate Pose is great for pregnant women, it feels good as well as it lengthens the sides of the belly, making more space for the internal organs as well as the baby.Â
Contraindications
- Knee Pain and Injury: Those who have chronic pain or recent injury (or inflammation) in hips or knee should use precaution as the pose puts quite a lot of pressure on the knee. Those with a serious knee injury can perform a variation of the pose sitting on a chair. A folded blanket may be used under the knees in case of mild pain/discomfort.
- Shoulder Pain: Those with shoulder pain or injury may place the top hand on the hip instead of raising it.Â
Steps
For the practice of Parighasana (Gate Pose), given below are the step-by-step instructions one must follow:
- Come into Half Circle Pose which is the opposite of Gate Pose. The Half Circle Pose is a variation of Gate Pose which will improve your balance, which is needed for Parighasana.Â
- After completing the Half Circle Pose, come to the centre and take a few breaths. Keeping the rib cage and pelvis in a straight line, chin parallel to the ground and knees hip-width apart take a few deep breaths.Â
- Inhale and step the right leg straight out to the side while keeping the left hip over the left knee, stay here for a few moments.
- Gently rotate the right leg so that the knee and toes are facing the ceiling and heel is on the ground.
- Turn your hips slightly towards the right, then inhale and slowly bring both arms up to the side
- Exhale and place your right hand on the right shin, stay here for some time understanding the body flow and movement along with the breath.
- Slowly exhale and stretch over to the right, contracting your right side and sliding the right hand further down your leg.
- Bring your left hand to your rib cage to rotate rib cage slightly towards the left, bringing your left arm up and over towards the right
- Lengthen the left arm and left side of the body, while opening up the chest
- Breathe and hold the posture for 3-8 breaths (or more).
- Note: The chest should be perpendicular to the floor
- If you’re a beginner, stay in this posture. For the advance version, rotate your right hand to face upwards and slide it further down such that the back of your hand touches your foot. Stretch your left hand further and bring it down so that your left palm touches your right and remain in the pose for a few breaths.
- While breathing out release the posture, bring both arms slowly to the side of the body and bring the right leg back to the kneeling position. For beginners, you may place the hands on the floor while bending the torso forward and then sit bringing the leg in front of you.
- Follow the same step-by-step instructions on your left side.
